Over the past 12 months I have seen 100s of this boards being brought to life in different colours palettes by creatives from ALL OVER THE WORLD. It’s so crazy! When I first posted this tutorial on my instagram stories last year, I had no idea this simple,yet effective method I used for creating my own food photography backdrops WILL GO VIRAL. Seeing creatives from different corners of the world trying it and creating MAGIC warms my heart every time!
TRY IT YOURSELF!
And make sure you tag me in your creations – I’d so excited to see how your board turns out.

VIDEO
HUGE THANK YOU to my dear friend Danny for creating this video with me!
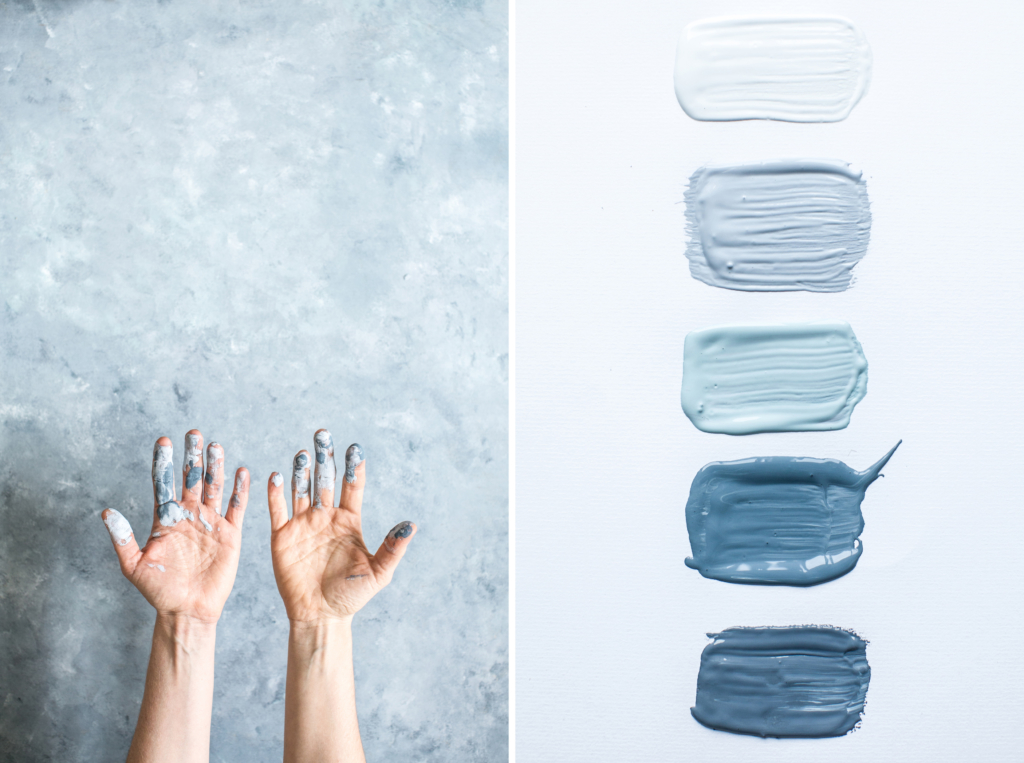
WHAT YOU’LL NEED
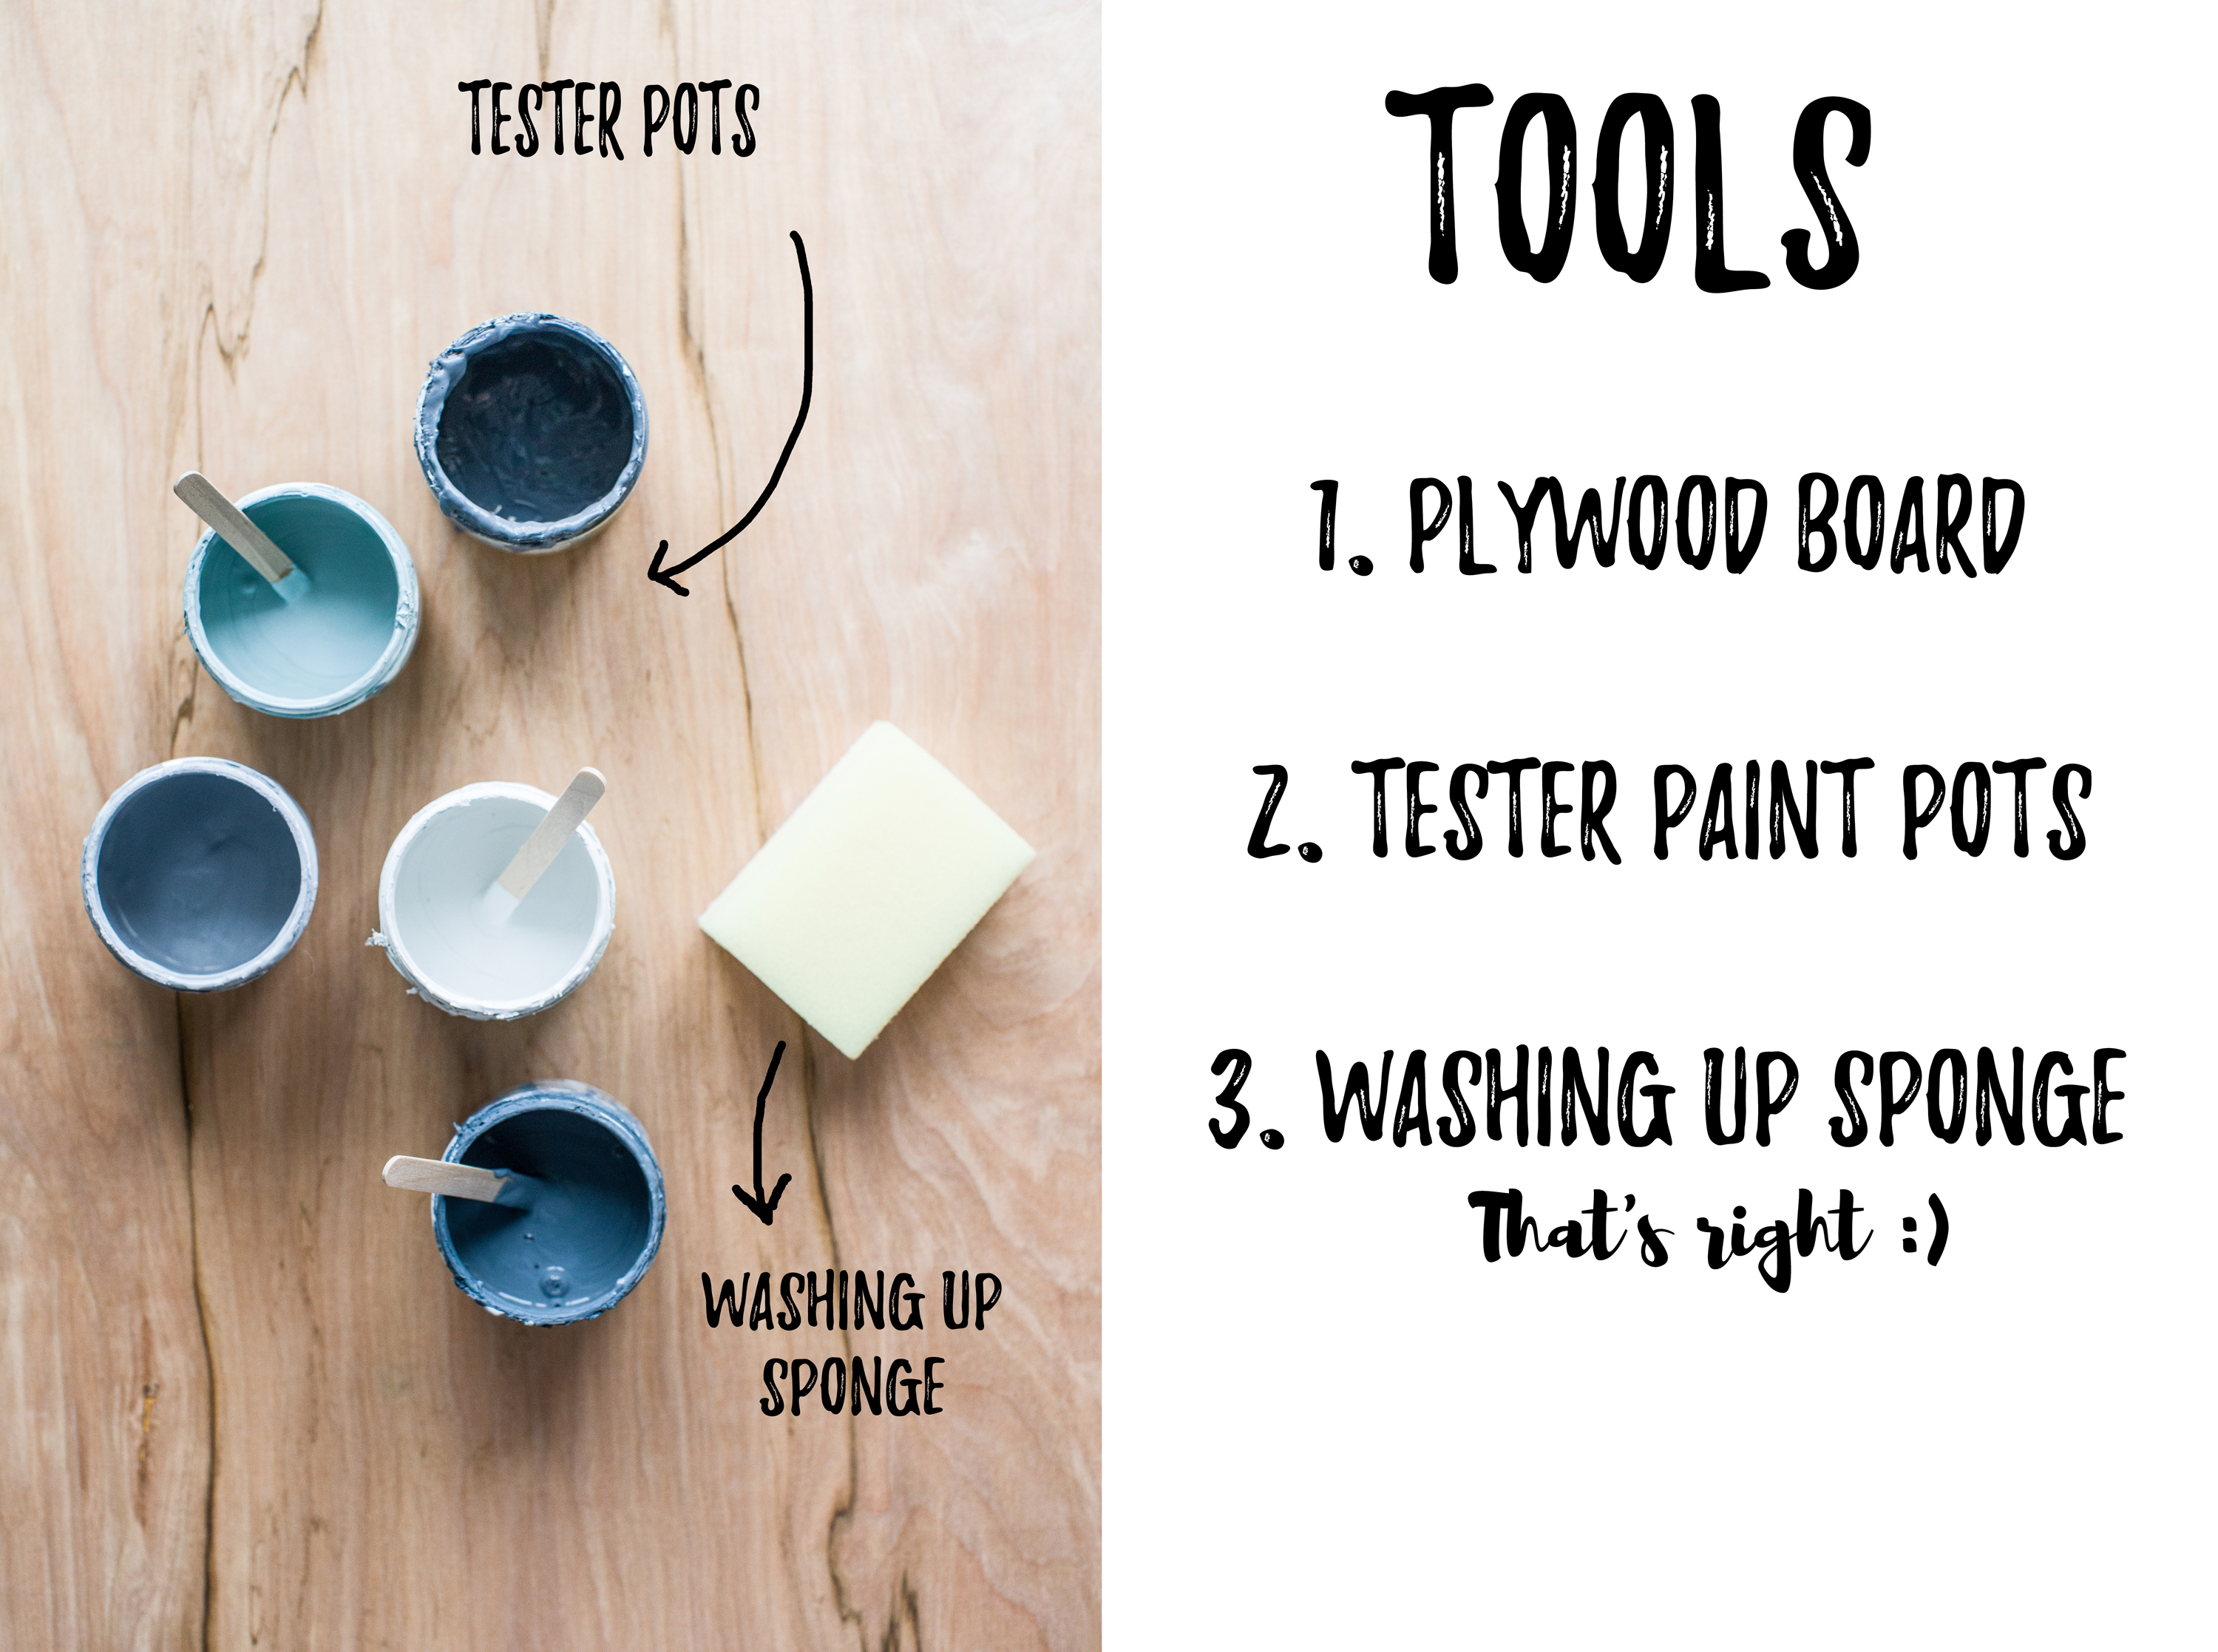
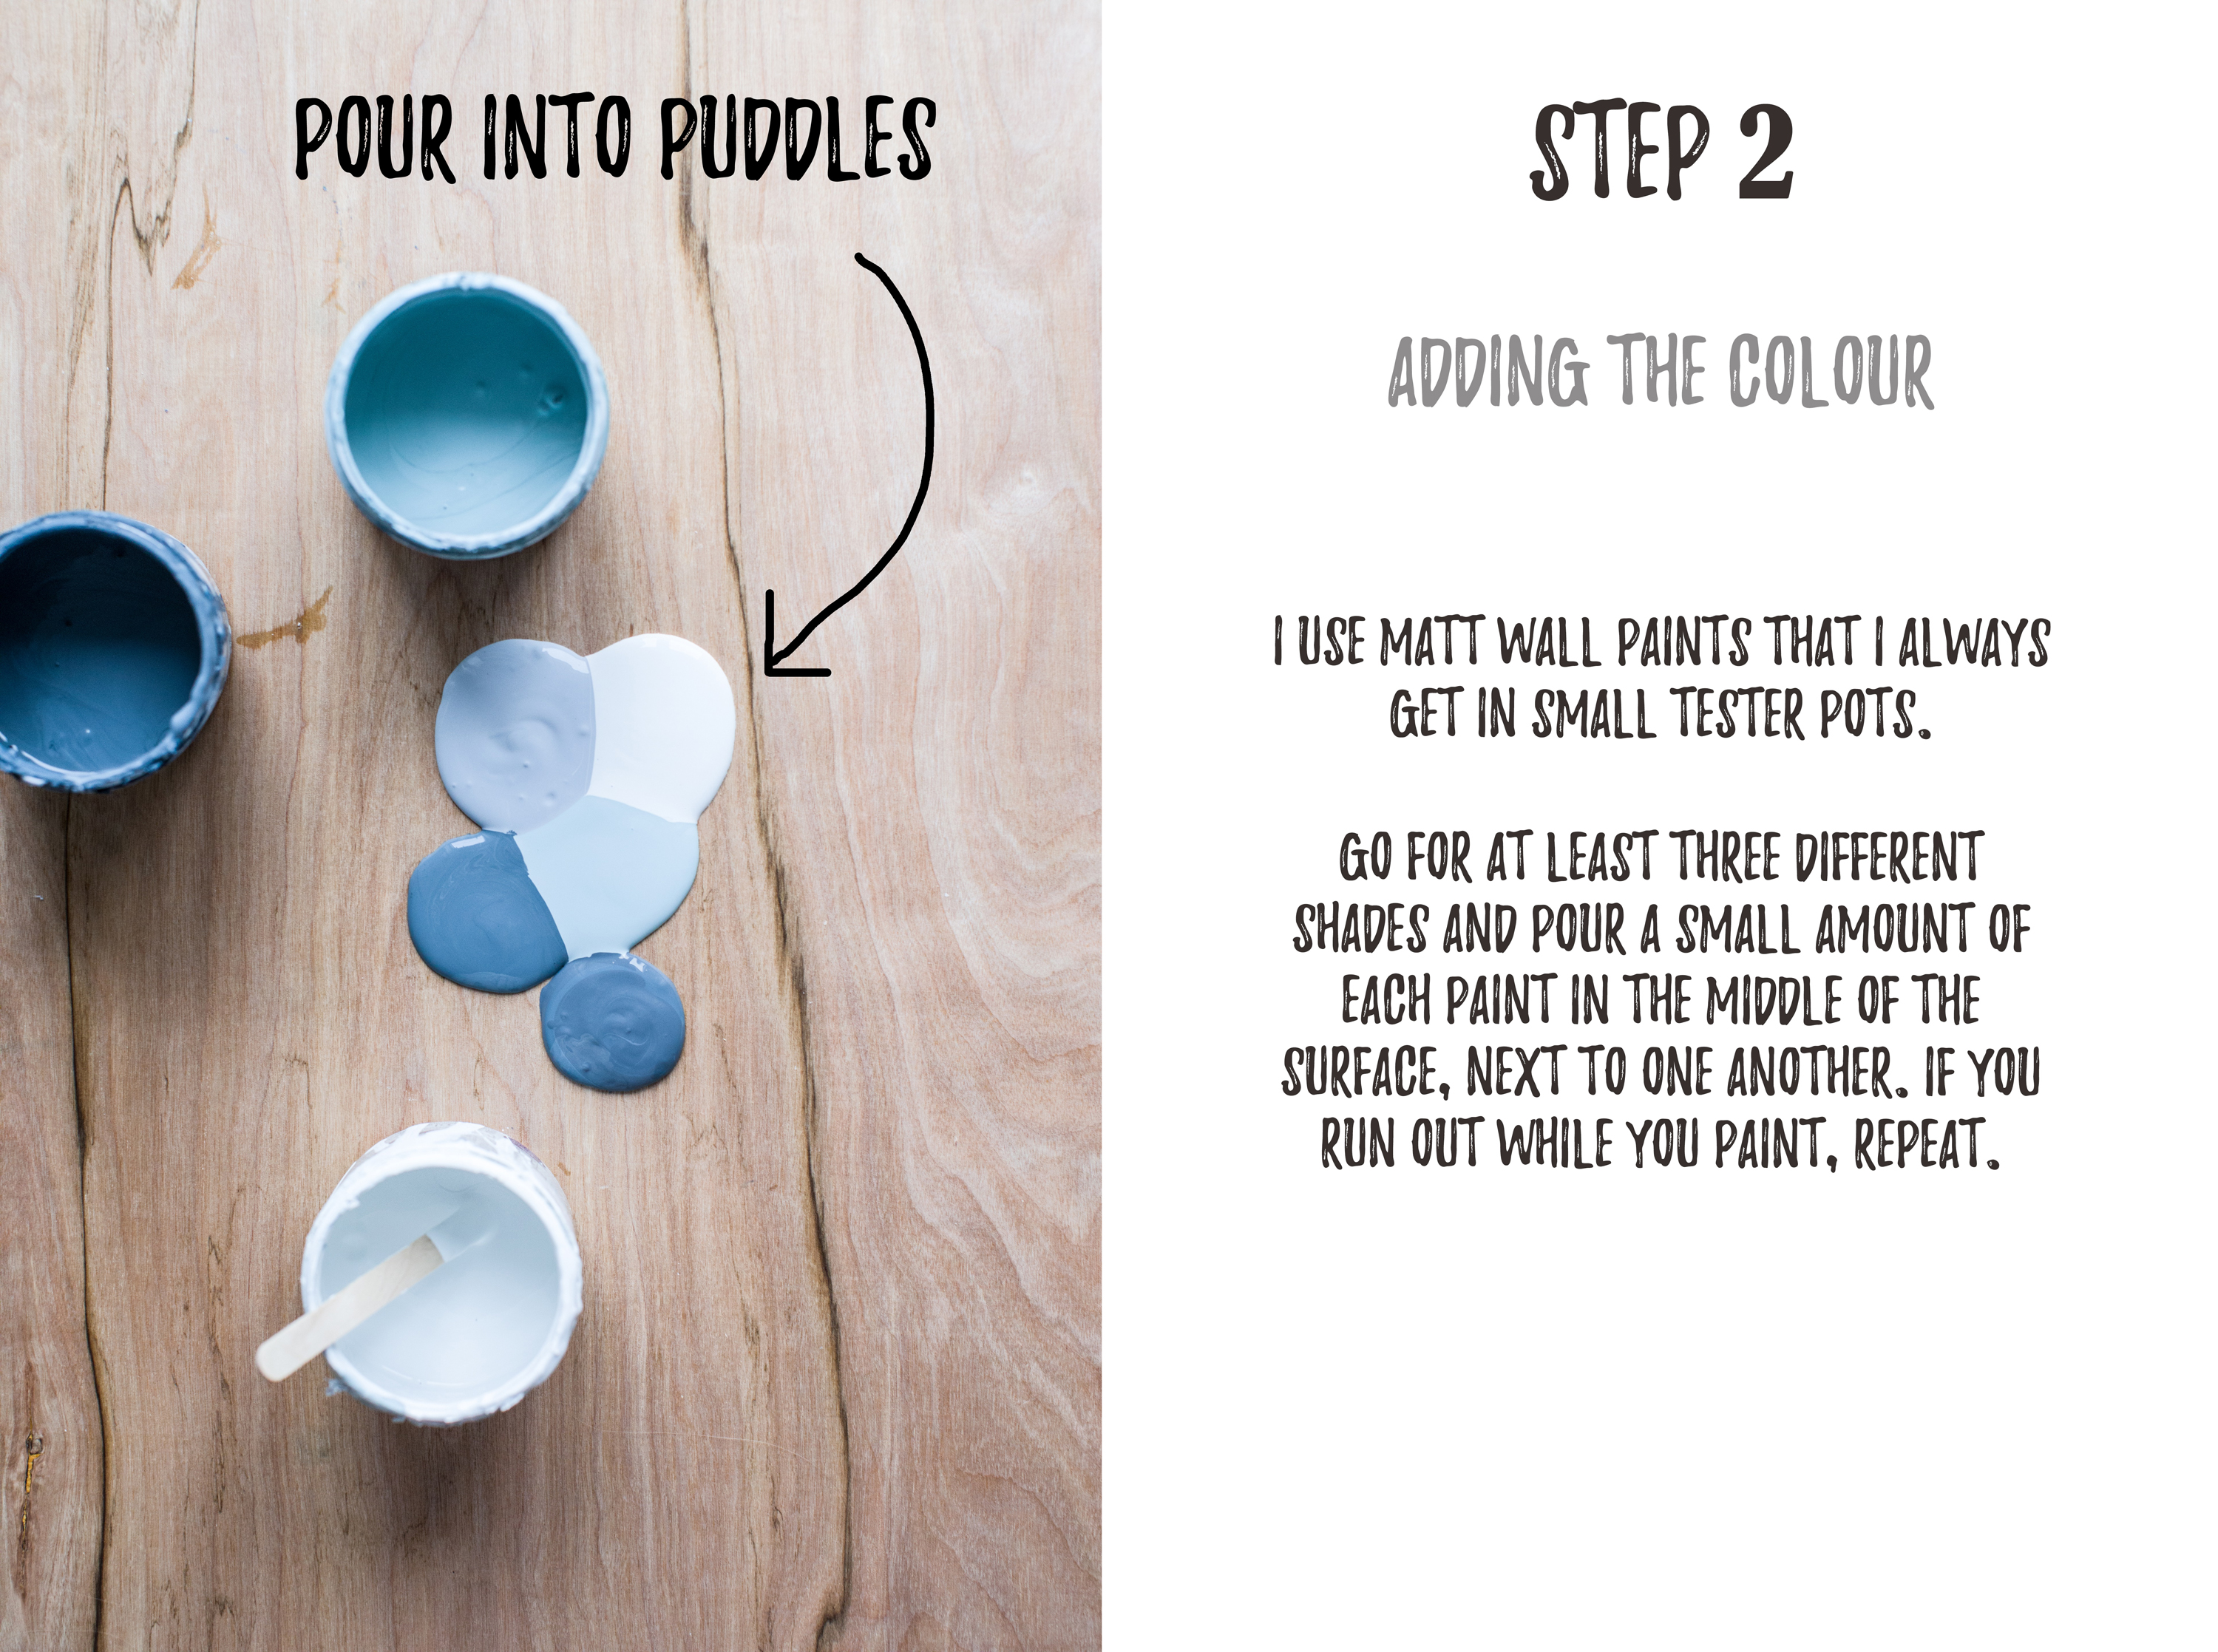
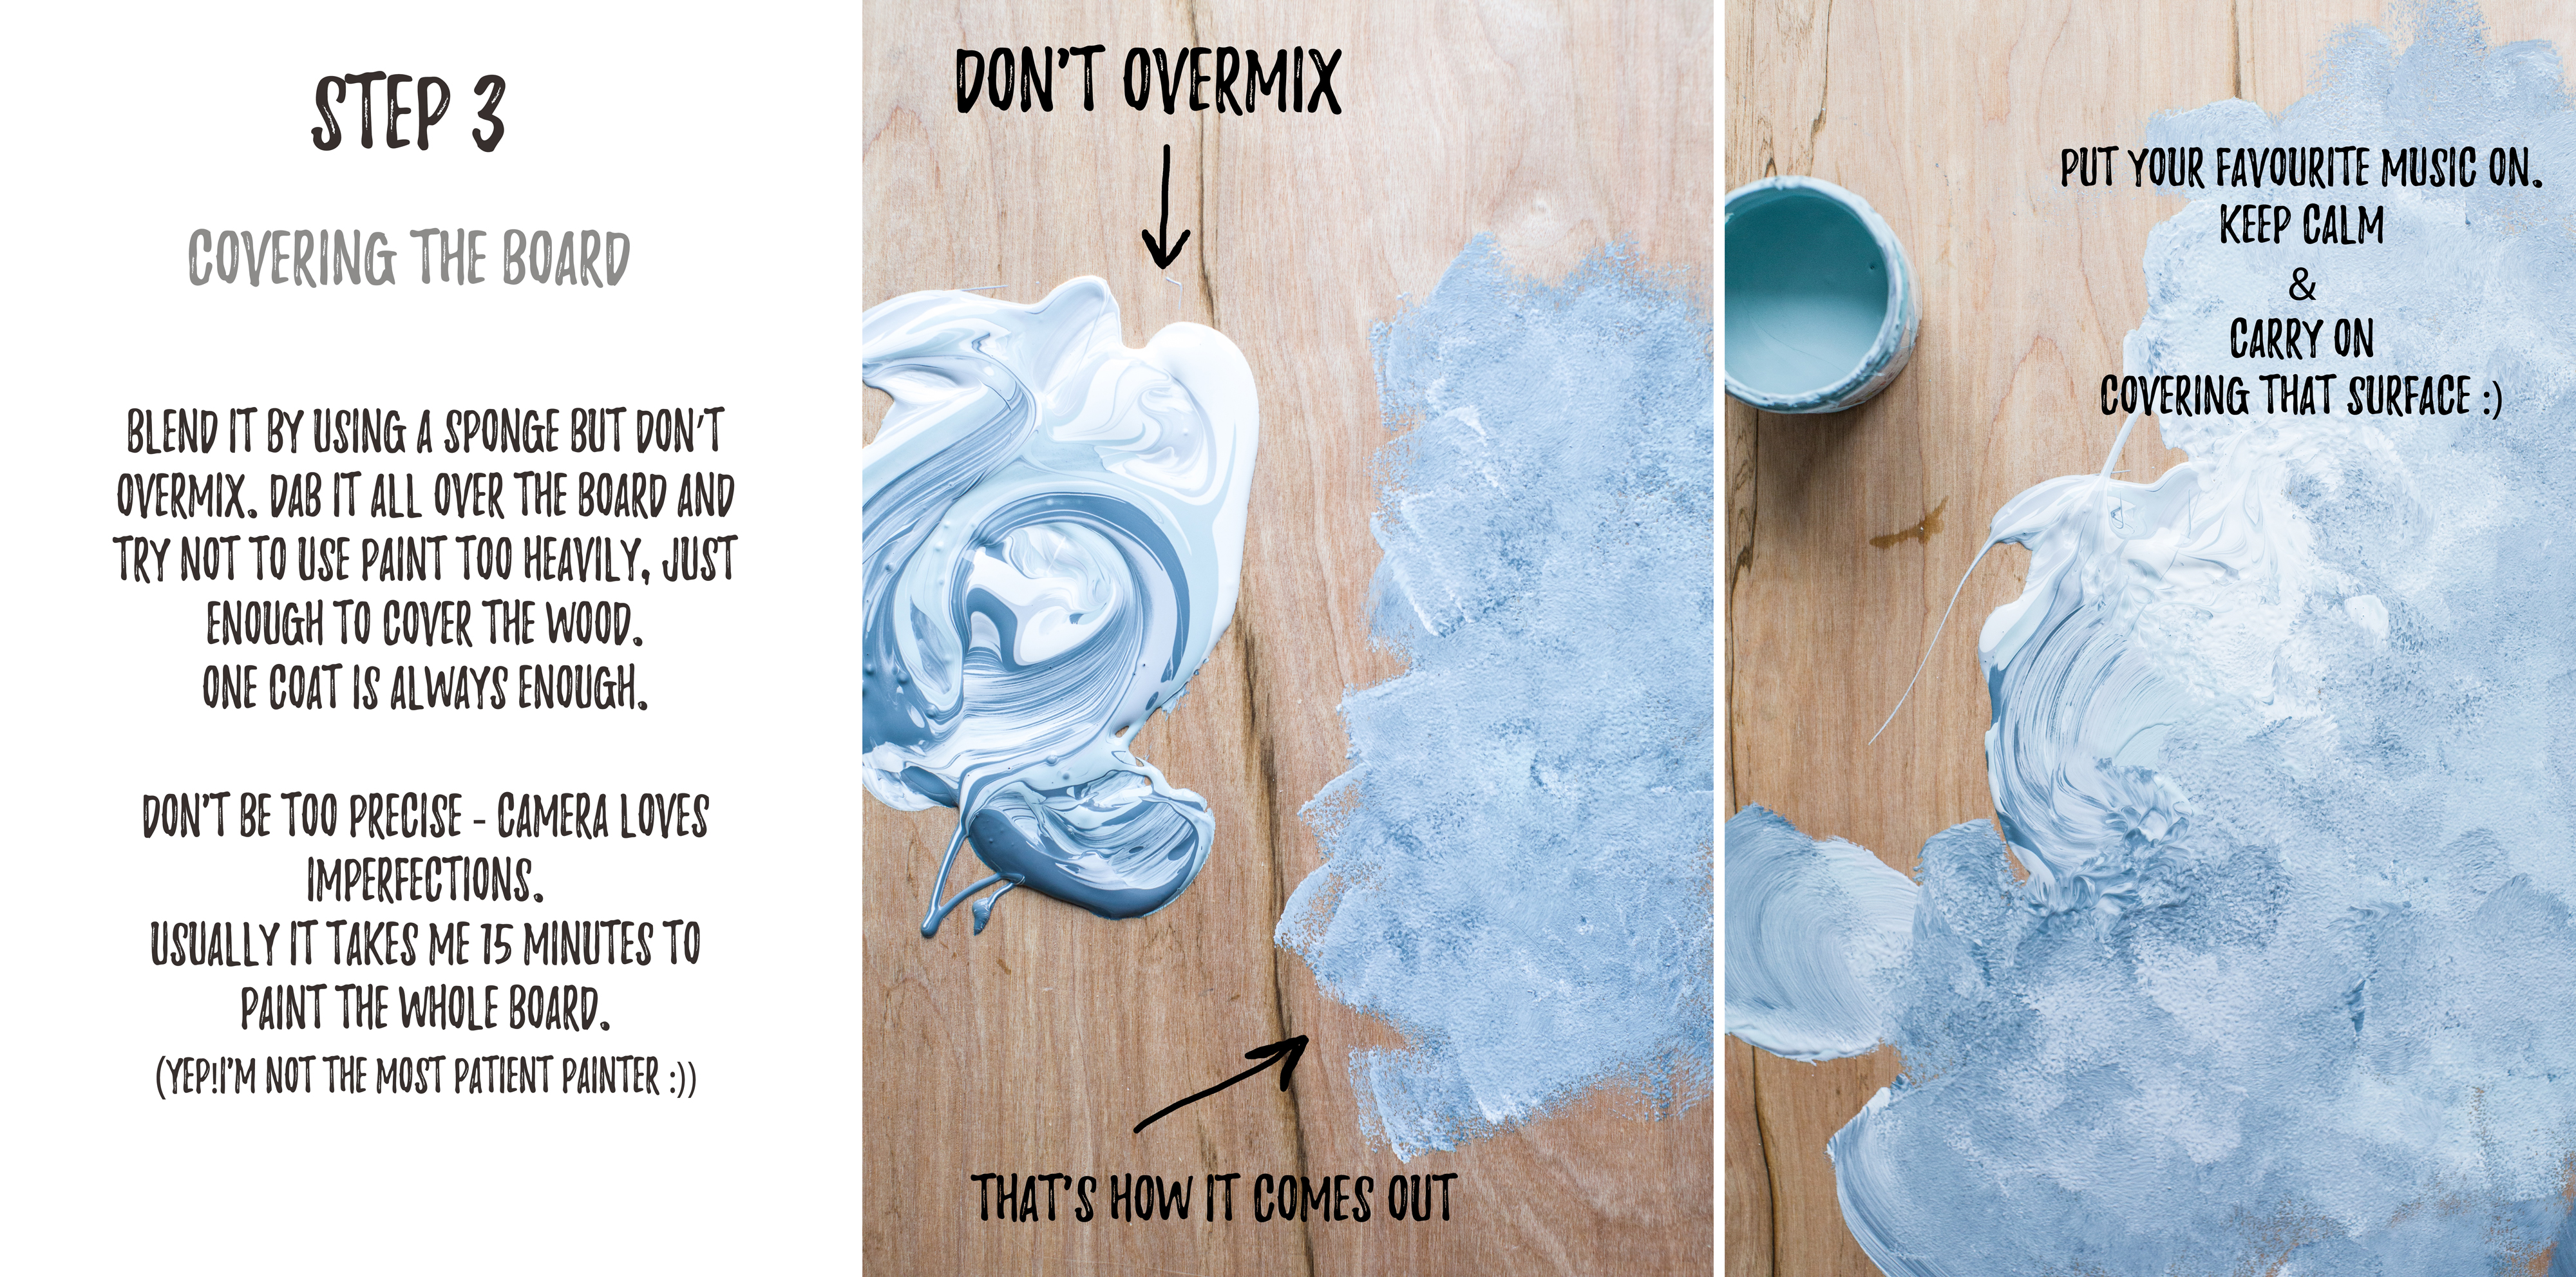
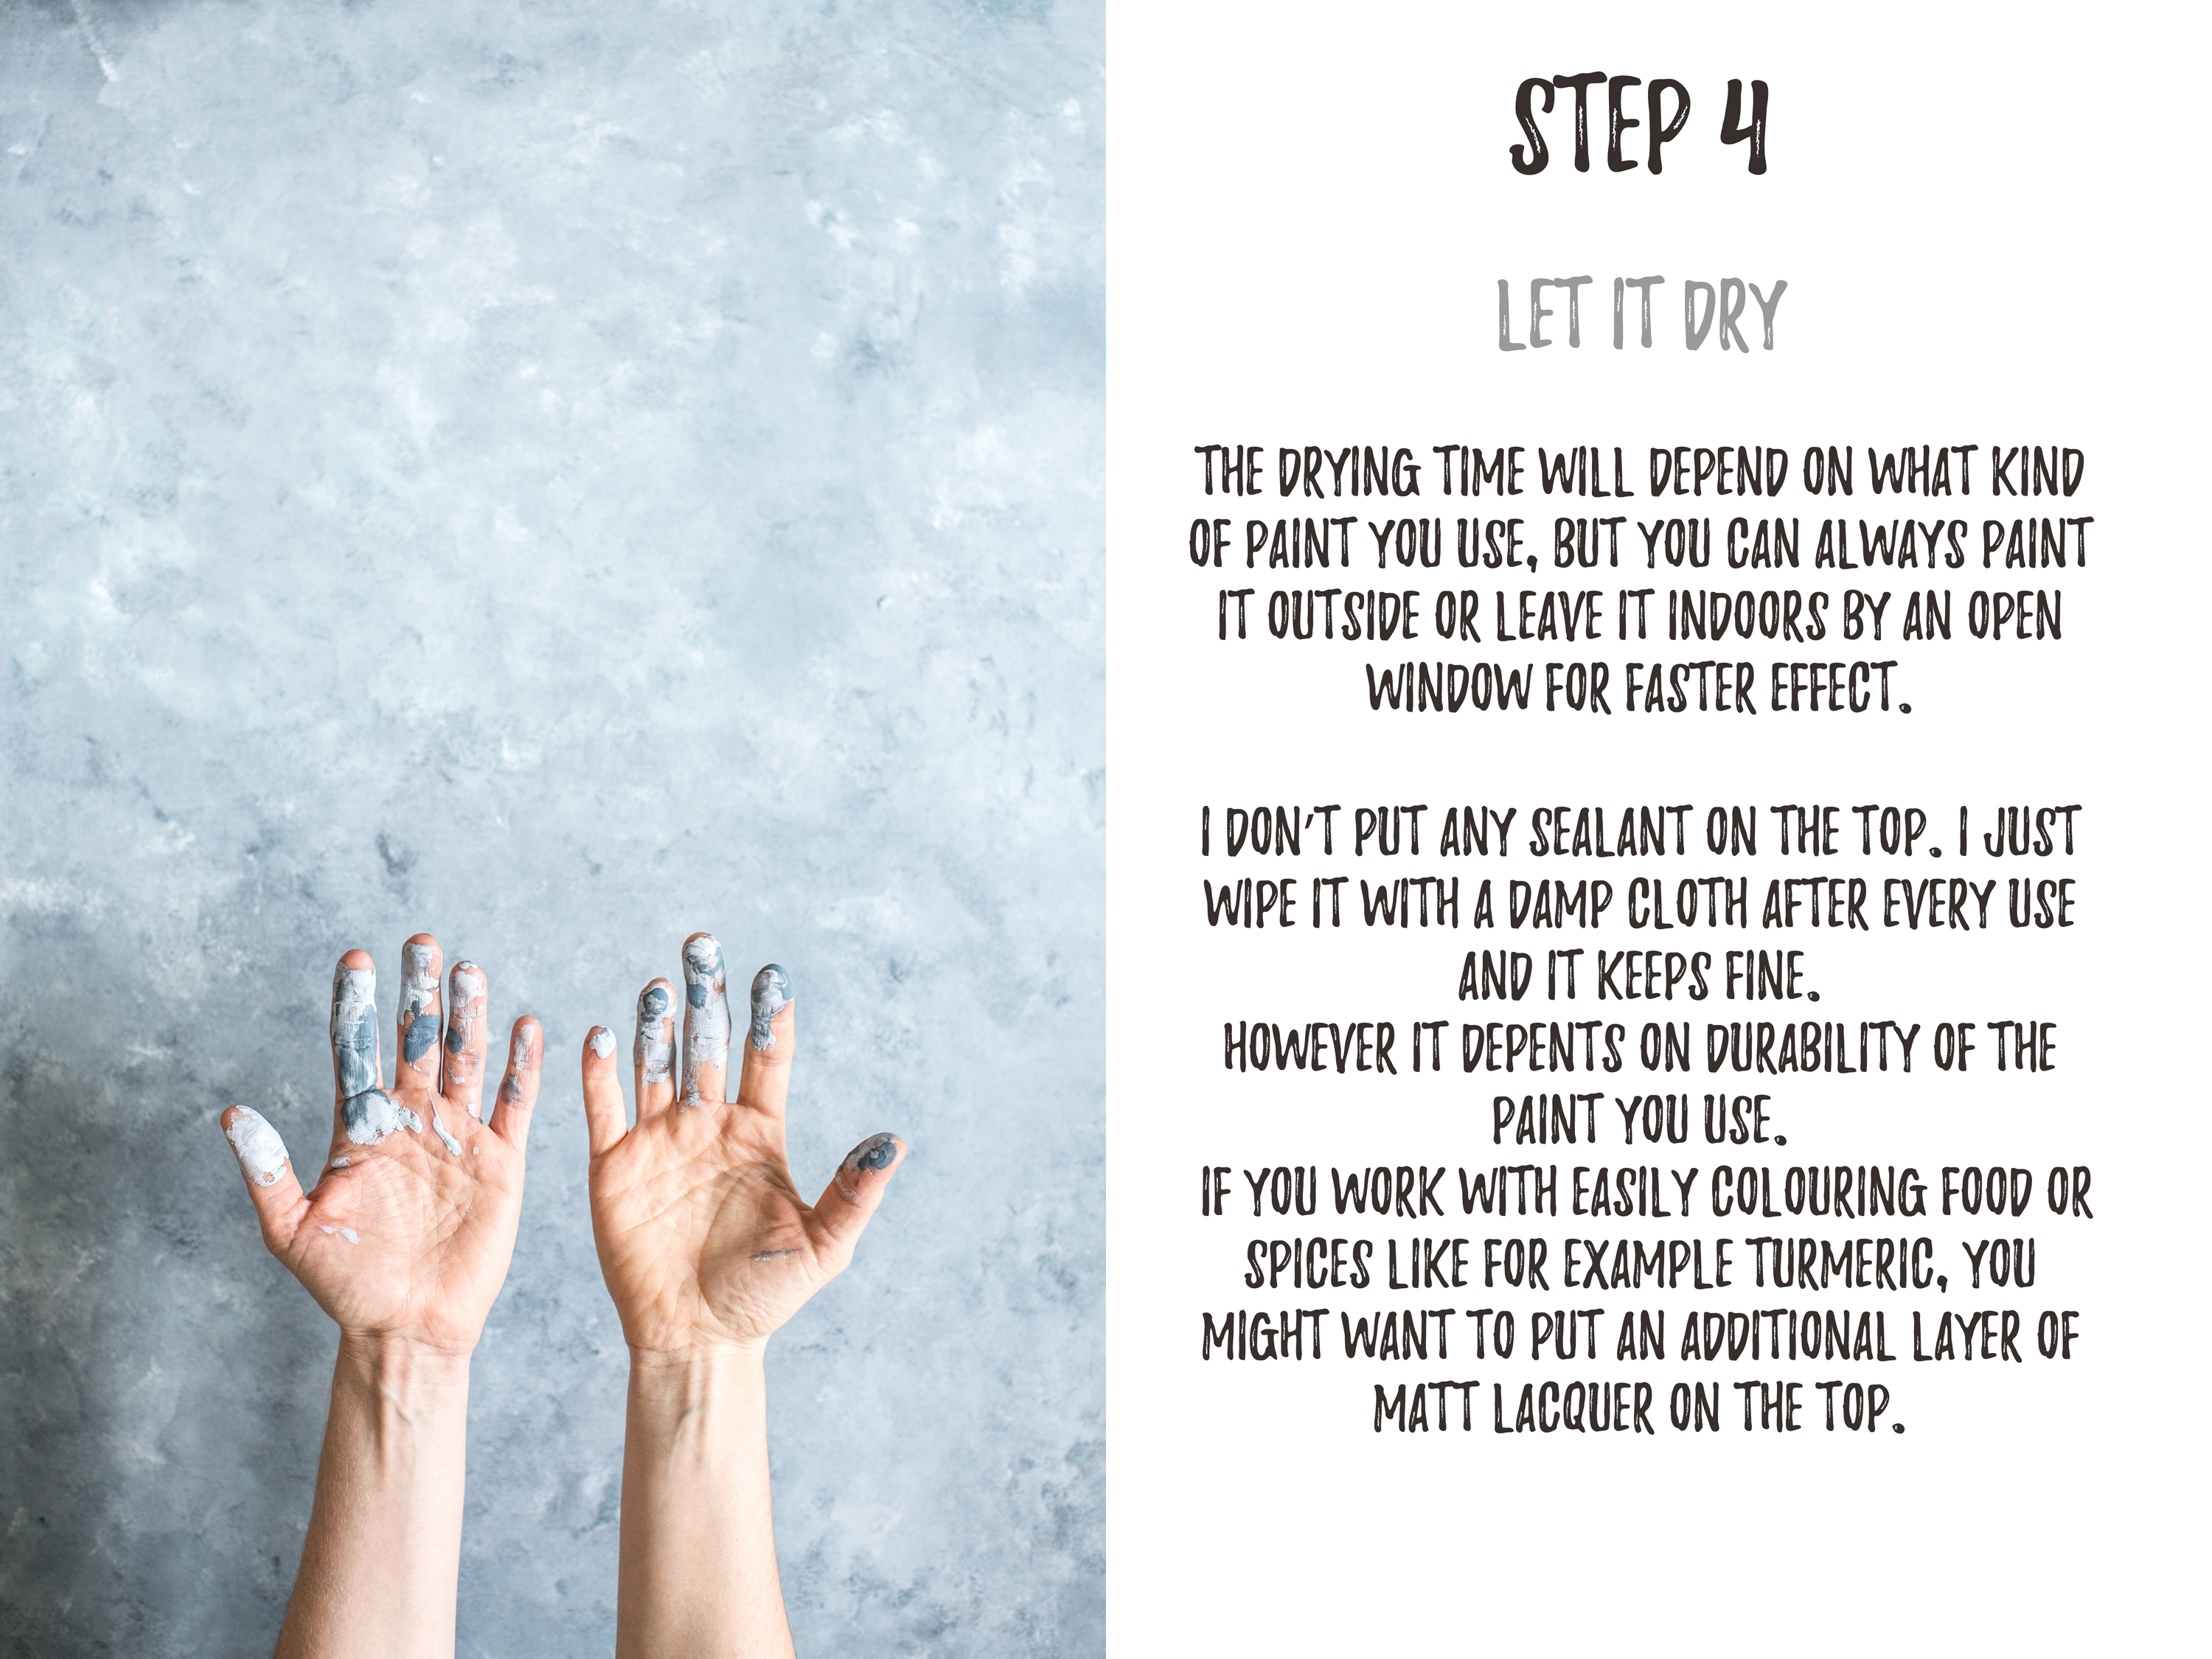
STEP BY STEP

TIPS
- Shoot on it! Don’t judge it before you try it!
Don’t forget camera see differently than our eyes. When I painted the first few boards I though ‘Nah, it’s horrible!’ then I forced myself to test it and photograph something on it and suddenly I was like ‘OMG!I love it!’So don’t judge it before you try it. - Space saver!
Save some space by using both sides of the board! - What colours to pick?
Go for different shades of the same colour for a powerful ‘blend’ which will be complementing your subject and not distracting from it. Blending darker and lighter shades of the same colour always works great! Check out Pinterest for some colour inspiration and try to recreate your favourites using this method. Or go to my INSTAGRAM to get inspired – most of my boards were painted with this method. - What paint to pick?
If you are going to place food directly on the board, I suggest finding good non toxic/eco friendly brand.
HAPPY PAINTING! Don’t forget to tag me in your creations – I’d love to see your boards!
